TatamiRacer
TatamiRacer is a tiny autonomous driving car built on a TAMIYA Mini 4WD kit that drives within a single tatami mat using Donkey Car deep-learning software.
- Self-driving 1:10
- Open source
- 3D printable
Suggested by Robotheca, created by @covao (opens in a new tab), from github.com/covao/TatamiRacer (opens in a new tab). Pinned to commit 9aa07f5 (opens in a new tab).
- Hardware license
- MIT (opens in a new tab)
- Software license
- MIT (opens in a new tab)
- Commercial use
- Allowed
This repository contains executable files that Robotheca doesn't check. Only run them if you trust the creator.
Photo and 3D model
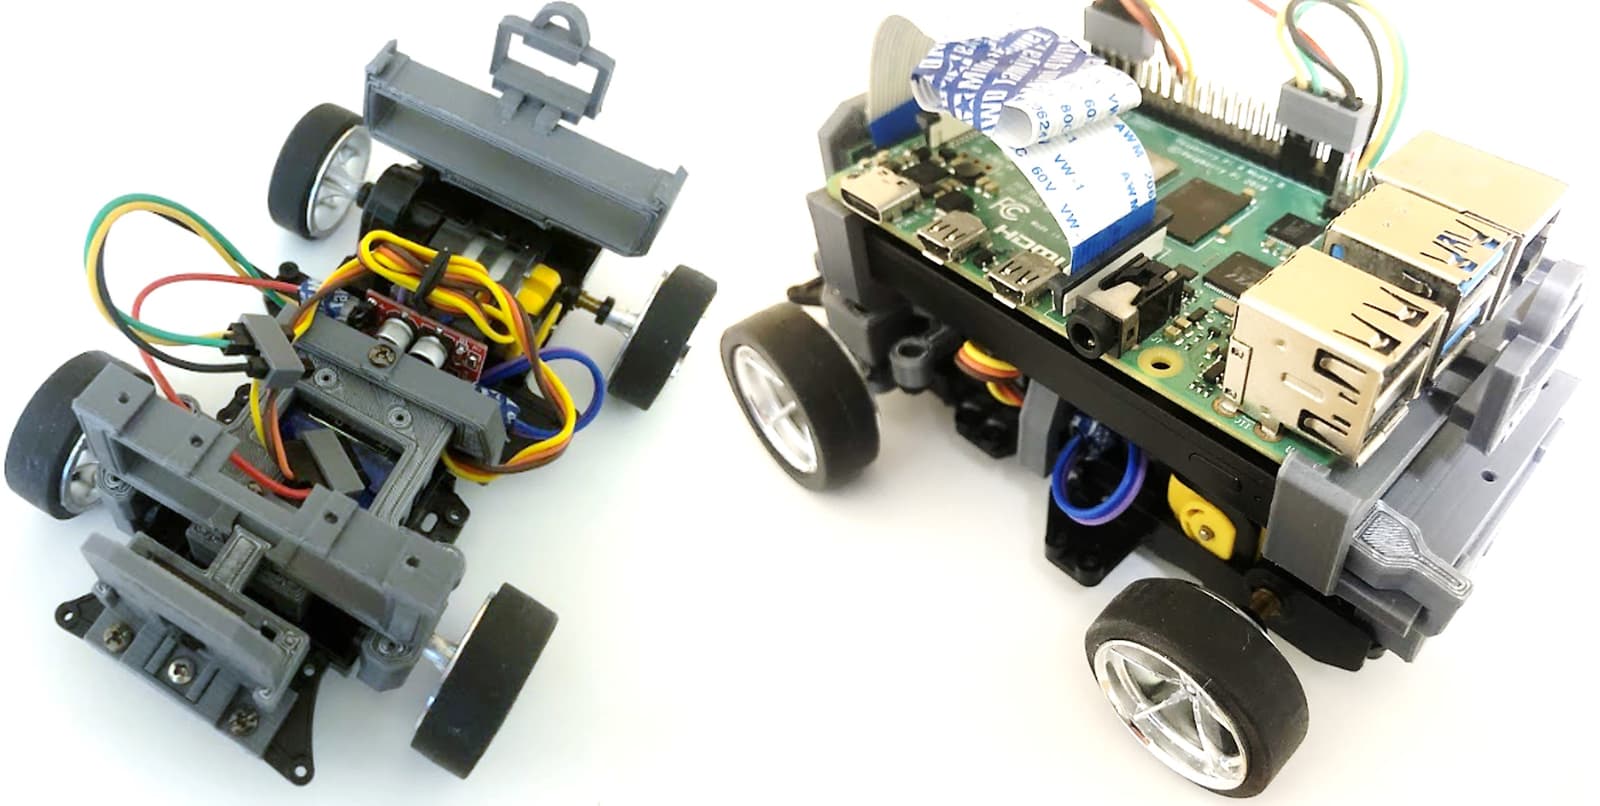
3D preview converted from github.com/covao/TatamiRacer at 9aa07f5, under MIT. View the original files from GitHub (6.8 MB) (opens in a new tab)
- Cable length
- 10 cm
What it can do
Written by Robotheca from the project's documents.
- Tiny autonomous driving car built on a TAMIYA Mini 4WD kit, operating within a single tatami mat (about 1.8m x 0.9m)
- Uses Donkey Car software for deep-learning and self-driving control
- Can be driven manually with a gamepad (USB or Bluetooth)
- Supports Raspberry Pi Zero 2 W or Raspberry Pi 4 as the onboard computer
Bill of materials
This repository has no parts list Robotheca can read yet.
Build guide
The creator's steps, each with its instructions.
- 1Print the 3D parts from the kit and assembly STL files
- 2Assemble the TAMIYA Mini 4WD chassis and attach the body
- 3Wire the Raspberry Pi, camera, motor driver, DC motor and micro servo according
- 4Set up the software (Donkey Car)
- 5Calibrate the TatamiRacer
- 6Train and drive the car
The guide appears here as you scroll.
Guide by @covao (README.md), under MIT.
More guides
Wiring and electronics
Notes written by Robotheca from the project's documents.
Main parts
- Raspberry Pi Zero 2 W or Raspberry Pi 4 as the controller board
- Raspberry Pi Camera Module (v1.3 OV5647 or v2.1 IMX219)
- L298N motor driver module for the DC motor (H-bridge)
- 130 DC drive motor, low speed and low current
- TowerPro SG90 micro servo for steering
- Mobile battery (5V, up to 2.1A) as power supply
- Micro SD card of 16GB or more for storage
- Optional gamepad for manual control
Connections
- Jumper cables with female connectors link the parts together
- The L298N motor driver is connected to the Raspberry Pi through male 90-degree pin headers
- The motor driver and harness are built by the builder as a separate assembly step
- The mobile battery powers the Raspberry Pi through a Type-C USB cable
Schematics, boards and diagrams
- img/Tatami Circuit.pngDiagram
- img/tatami_circuit_1100cmx100cm_200dpi.jpgDiagram
- img/tatami_circuit_110cmx100cm_200dpi.jpgDiagram
- img/tatami_circuit_110cmx100cm_preview.jpgDiagram
- img/tatami_circuit_150cmx100cm_200dpi.jpgDiagram
- img/tatami_circuit_150cmx100cm_preview.jpgDiagram
- img/TatamiRacer_Circuit.pngDiagram


