SO-ARM 102
An open-source leader and follower robot arm kit with 5 degrees of freedom plus a gripper, for teleoperation and imitation learning.
- Robot arm
- Open source
- Works with AI
- LeRobot
- 3D model (URDF)
- 3D printable
Suggested by Robotheca, created by @roboninecom (opens in a new tab), from github.com/roboninecom/SO-ARM-102 (opens in a new tab). Pinned to commit 8922eaf (opens in a new tab).
- Hardware license
- CERN-OHL-P-2.0 (opens in a new tab)
- Software license
- Apache-2.0 (opens in a new tab)
- Commercial use
- Allowed
Photo and 3D model
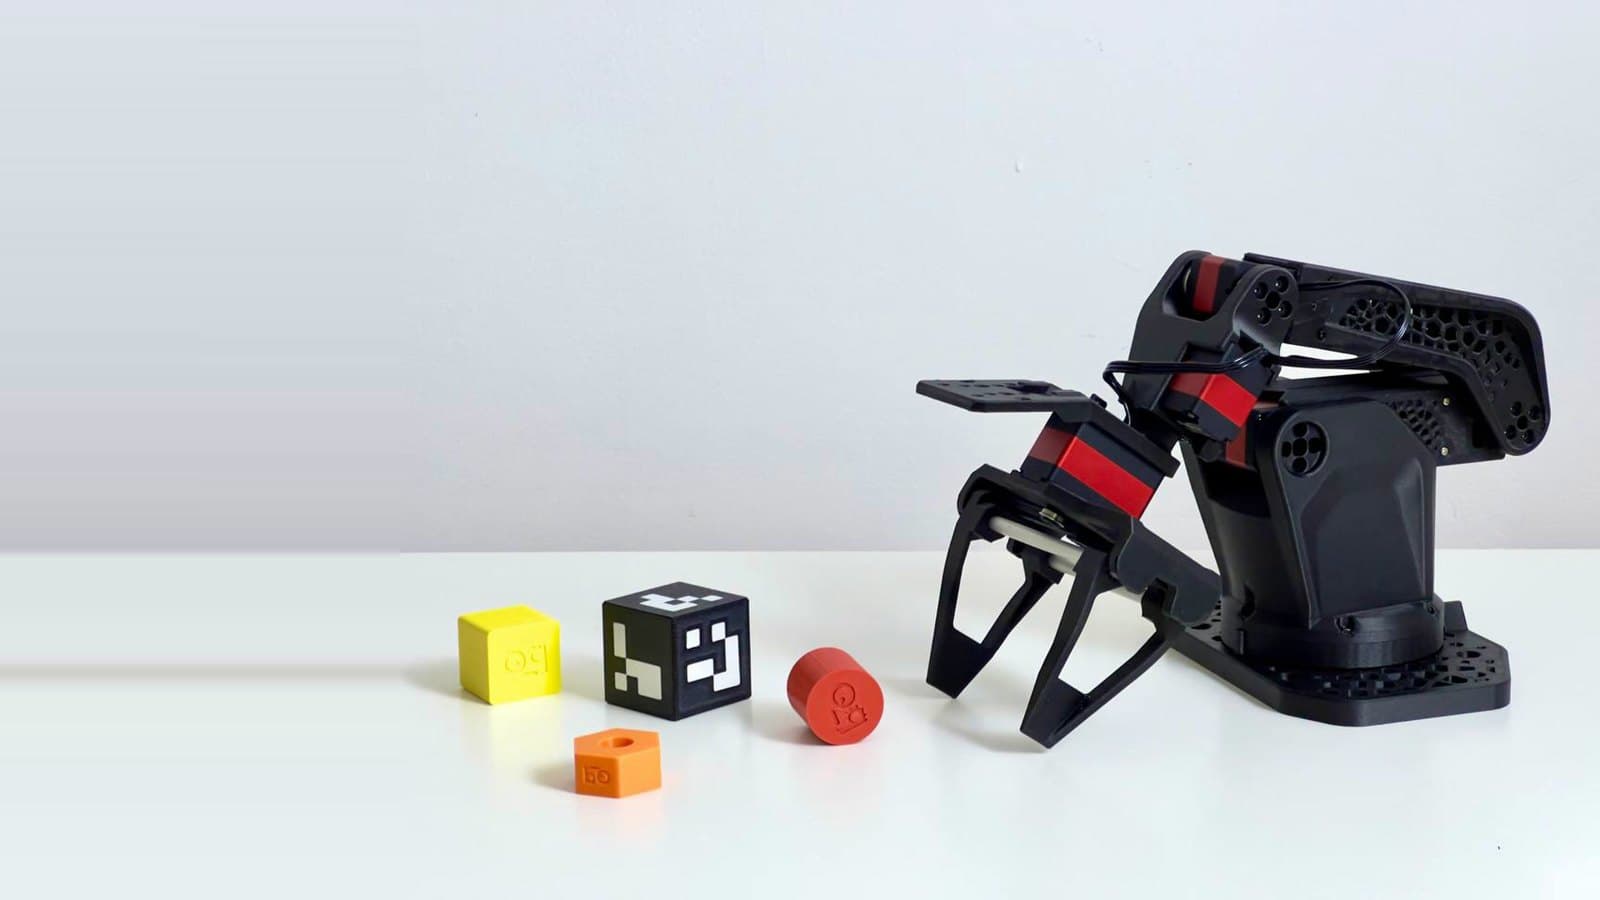
3D preview converted from github.com/roboninecom/SO-ARM-102 at 8922eaf, under CERN-OHL-P-2.0. View the original files from GitHub (3.3 MB) (opens in a new tab)
- Degrees of freedom
- 5
- Reach
- 483 mm
- Payload
- 300 g
What it can do
Written by Robotheca from the project's documents.
- Leader-follower teleoperation: a hand-moved leader arm drives a follower arm that repeats the motion
- Five degrees of freedom plus a parallel gripper with an 85 mm span
- Records demonstrations for imitation learning and works with LeRobot SO-101 datasets and policies
- Bimanual configuration uses two leader and two follower arms side by side
- Follower has a wrist-mounted USB camera (1080p in the parts list)
Works with AI
Found by Robotheca in the project's files at commit 8922eaf, its robot.yaml and Robotheca's notes on its documents. Never guessed; Robotheca doesn't run the code.
Runs LeRobot
Stated in robot.yaml“Records demonstrations for imitation learning and works with LeRobot SO-101 datasets and policies”
Robotheca's notes: What it can do
Bill of materials
12 parts12 of 12 parts shown
12 of 12 parts have no price in the source, so there is no parts total. Read from docs/bom.md at the pinned commit.
Build guide
The creator's steps, each with its instructions.
- 1Print the parts
- 2Buy the hardware
- 3Assemble
- 4Set up the software
The guide appears here as you scroll.
Guide by @roboninecom (README.md), under CERN-OHL-P-2.0 (hardware) and Apache-2.0 (software).
More guides
Wiring and electronics
Notes written by Robotheca from the project's documents.
Main parts
- Two Waveshare bus servo controllers: Bus Servo Driver HAT on the follower, Bus Servo Adapter on the leader
- Follower servos: 2 x STS3235, 2 x STS3250, 2 x STS3215
- Leader servos: 6 x STS3215
- Follower powered by a 12 V DC supply; leader powered by a 5 V DC supply
- USB-C cables connect each controller to a computer
- USB camera, 1080p, mounted on the follower wrist
Connections
- Servo cables run along the arm from joint to joint; the documents say to leave slack in each cable before closing a joint
- Follower controller connects to the 12 V supply and leader controller to the 5 V supply; the two supplies must not be swapped
- Both controllers connect to the computer over USB-C
- Servo IDs are set individually before installation: 1 base, 2 shoulder, 3 elbow, 4 wrist flex, 5 wrist roll, 6 gripper or trigger
Cables and connectors
From the parts list.
- USB-C cable, 1.5 m × 2
- Servo cables × 12