Project files
- CMake3 files
- linker1 file
- src39 files
- STM32F160 files
- ThirdParty25 files
- tools4 files
- build-debug.shprogram or script1 KB
- build-eclipse.shprogram or script1 KB
- build.shprogram or script1 KB
- CMakeLists.txt1 KB
- code-format.shprogram or script1 KB
- gimbal.mdj256 KB
- README.md3 KB
- st-link.png27 KB

README.md
Machine-translated by Robotheca from the original in Chinese (opens in a new tab). License: Apache-2.0 (opens in a new tab).
Development Environment Description
IDEs etc.
-
Development IDE: VSCode
-
Compilation software: arm-none-eabi-gcc, cmake
Installation on Ubuntu: apt install arm-none-eabi-gcc
- Flashing software 1: stlink
# Install dependencies
$ sudo apt-get install libusb-1.0
$ sudo apt-get install cmake
$ sudo apt-get install libgtk-3-dev
$ sudo apt install libreadline-dev

# Install JLink
$ sudo apt install stlink-tools
$ sudo apt install stlink-gui

$ st-flash --version
        v1.7.0
Compilation
$ mkdir build
$ cd build
$ cmake -G "Unix Makefiles" -D "CMAKE_TOOLCHAIN_FILE=../CMake/GNU-ARM-Toolchain.cmake" ..
$ make
$ ll src
total 1.0M
drwxrwxr-x  3 eagle 4.0K Jun  11 23:15 .
drwxrwxr-x  6 eagle 4.0K Jun  11 15:15 ..
-rwxrwxr-x  1 eagle  18K Jun  11 23:15 body_control.bin
-rwxrwxr-x  1 eagle 360K Jun  11 23:15 body_control.elf
-rw-rw-r--  1 eagle  51K Jun  11 23:15 body_control.hex
-rw-rw-r--  1 eagle 334K Jun  11 23:15 body_control.lss
-rw-rw-r--  1 eagle 213K Jun  11 23:15 body_control.map
drwxrwxr-x 11 eagle 4.0K Jun  11 23:15 CMakeFiles
-rw-rw-r--  1 eagle 1017 Jan  14 08:26 cmake_install.cmake
-rw-rw-r--  1 eagle  27K Jan  14 08:26 Makefile
Flashing
Method 1: ST-LINK
$ cd src
$ sudo st-flash write body_control.bin 0x8000000

$ If flashing in WSL, execute the following in Windows Terminal:
   1 usbipd list
   2 usbipd bind --busid 2-4
   3 usbipd attach --wsl --busid 2-4
Alternatively, open the ST-LINK software, click Connect, select the body_control.bin file, and click the Flash button.
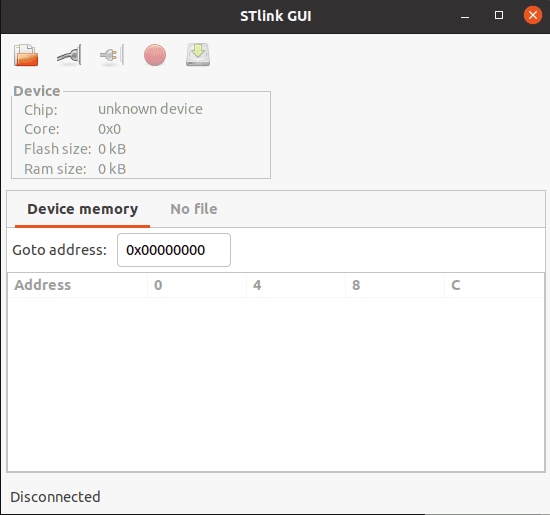
After flashing is complete, change the BOOT0 jumper back to 0.
Dependencies
Dependencies: python3, python-pip3, python serial
Install python serial: https://www.geeksforgeeks.org/how-to-install-python-serial-package-on-linux/ (opens in a new tab)
If an error occurs: usr/bin/env: ‘python’: No such file or directory
Run the following command to resolve it:
sudo ln -s /usr/bin/python3 /usr/bin/python
- Serial debugging tool: VS Code Serial Monitor extension
Issues and Notes
- 1 The interrupt priority of the central controller must be set correctly; otherwise, strange issues may occur. The interrupt priority of UART2 must be lower than the
configLIBRARY_MAX_SYSCALL_INTERRUPT_PRIORITYconfiguration (i.e., the number should be larger). Also, make sure to add this line:
NVIC_PriorityGroupConfig(NVIC_PriorityGroup_4); /* Set priority grouping to 4, i.e., preemption priority range is 0-15 */
- 2 When using a serial tool to send and debug commands, ensure that a newline character is appended to the end of each command, as the command reception uses the newline character as the termination identifier. Without a newline, the system will keep collecting the command.
References
https://github.com/larriti/stm32f10x-template (opens in a new tab)
https://github.com/erhankur/stm32f103-bluepill (opens in a new tab)
CMake-based STM32F103C8 Template (Blue Pill)
Based on https://github.com/ahessling/STM32F4Template (opens in a new tab)
As an addition;
- Style fixer tool (astyle) can be used with
./code-format.sh make monitorwill open picocom serial terminal
Build
./build.sh
cd build
make
Download binary
make flash # this will run openocd if it is found during cmake process
Serial terminal
make monitor # this will run picocom with 115200 8N1
Of course you can run all commands in one shot
make flash monitor
Debug
make gdb # this will run gdb and openocd in the background.

todo: kill openocd upon gdb termination
Files by @coregiu, at commit c9d4b8e, read from GitHub in your browser. Hardware license: Apache-2.0; software license: Apache-2.0. Robotheca doesn't review code: read it before running it.