PROBE LX-3
An open-source, 3D-printed Raspberry Pi 5 differential-drive rover with a camera, a time-of-flight distance sensor, a twist-lock dome and room for a lidar.
- Wheeled
- Open source
- 3D printable
Suggested by Robotheca, created by @patmakesapps (opens in a new tab), from github.com/patmakesapps/PROBE-LX-3 (opens in a new tab). Pinned to commit 1ed5ff4 (opens in a new tab).
- Hardware license
- CC-BY-SA-4.0 (opens in a new tab)
- Software license
- CC-BY-SA-4.0 (opens in a new tab)
- Commercial use
- Allowed
Photo and 3D model
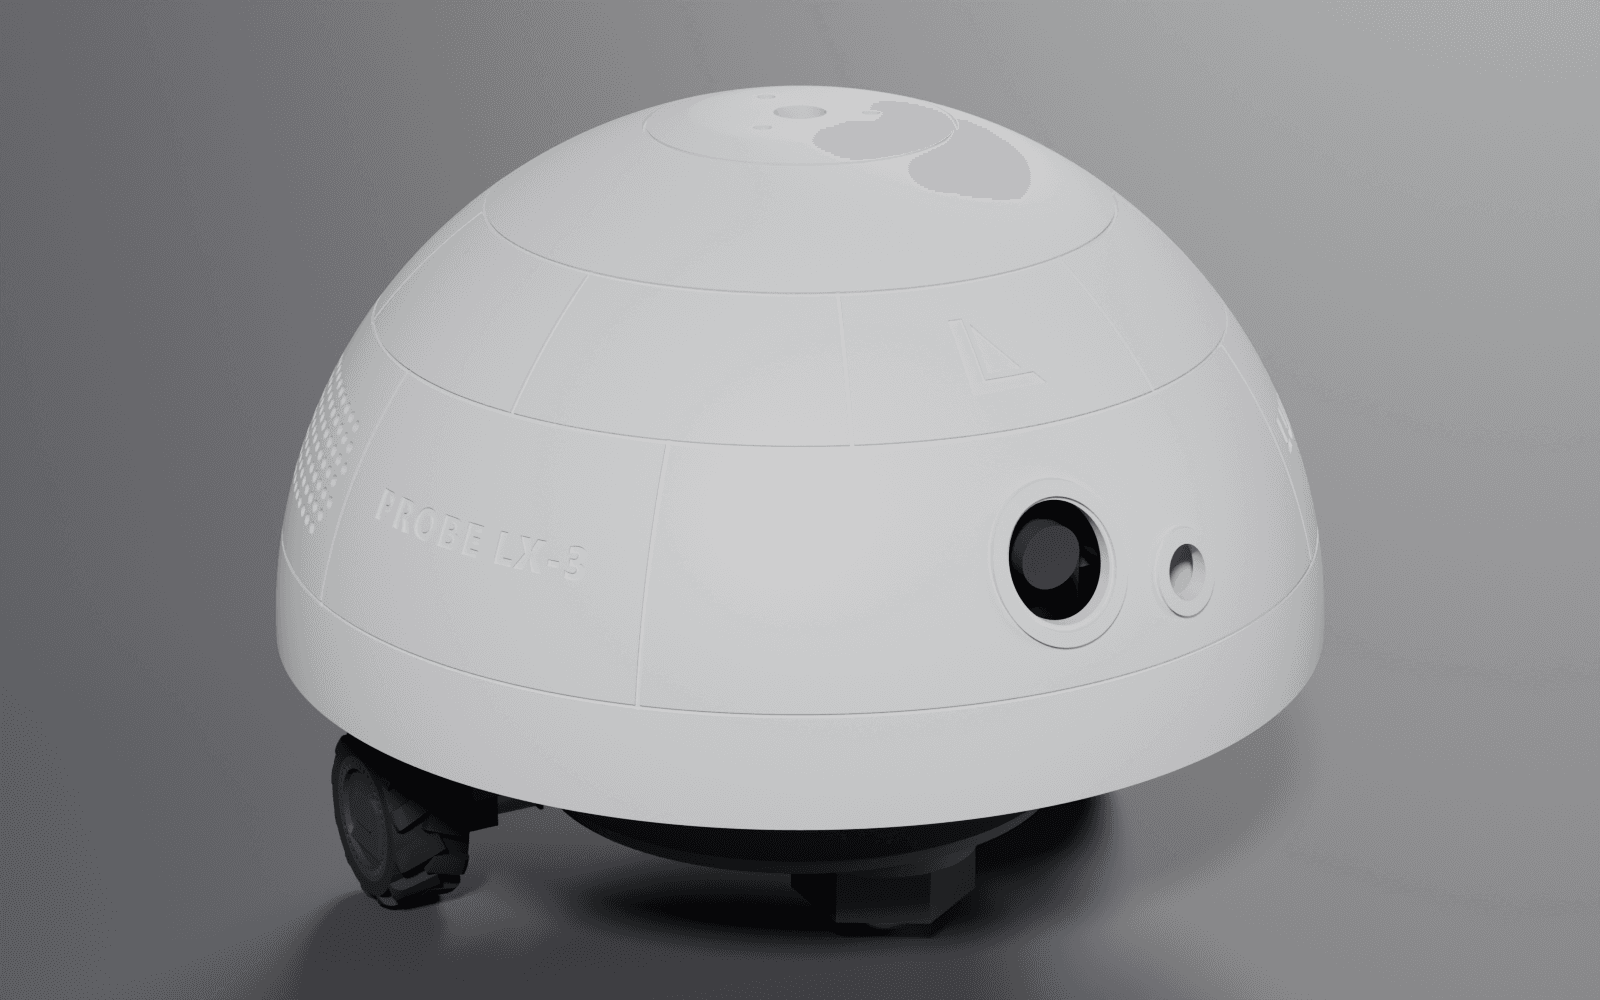
3D preview converted from github.com/patmakesapps/PROBE-LX-3 at 1ed5ff4, under CC-BY-SA-4.0. View the original files from GitHub (9.7 MB) (opens in a new tab)
- Height
- 186 mm
What it can do
Written by Robotheca from the project's documents.
- Differential drive robot with two rear N20 motors and a front ball caster, driven through a motor bonnet
- Carries a USB camera for vision and a VL53L1X time-of-flight sensor for distance sensing
- Dome twist-locks onto the base for access to electronics
- Optional RPLIDAR A1M8 lidar mount on top and optional WM8960 audio HAT with two speakers
- Repository is hardware only; no software ships with it, and users write their own control software
Bill of materials
27 parts27 of 27 parts shown
| # | Component | Quantity | Est. price | Supplier |
|---|---|---|---|---|
| 1 | Raspberry Pi 5 (2 GB or larger) | 1 | – | – |
| 2 | Geekworm X1200 2-cell 18650 UPS HAT for Pi 5 | 1 | – | – |
| 3 | 18650 Li-ion cells | 2 | – | – |
| 4 | Adafruit 4280 DC + Stepper Motor Bonnet for Raspberry Pi | 1 | – | – |
| 5 | Arducam B0385 USB camera module (38 × 38 mm board) | 1 | – | – |
| 6 | CQRobot VL53L1X time-of-flight distance sensor (28.5 × 23 mm board) | 1 | – | – |
| 7 | microSD card (32 GB+) | 1 | – | – |
| 8 | USB-C charger | 1 | – | – |
| 9 | Jumper wires (female, 4 × for the VL53L1X to Pi I²C) | – | – | – |
| 10 | N20 micro gear motor (standard D-shaft) | 2 | – | – |
| 11 | Meccanixity N20 motor bracket (with M2 screws and nuts) | 2 | – | – |
| 12 | MARRTEUM ball caster (20 mm ball, adhesive pad) | 1 | – | – |
| 13 | 4 × AA battery holder, with a switch and leads | 1 | – | – |
| 14 | AA cells | 4 | – | – |
| 15 | SLAMTEC RPLIDAR A1M8 (with its USB adapter board) | 1 | – | – |
| 16 | Printed lidar adapter (stl/PROBE-LX3_lidar-adapter_optional.stl) | 1 | – | – |
| 17 | M3 × 4 × 5 heat-set insert | 3 | – | – |
| 18 | M3 × 6 button head | 3 | – | – |
| 19 | M2.5 screw, length to suit the A1M8 mounting holes (they pass through Ø2.7 holes in the adapter posts) | 4 | – | – |
| 20 | Waveshare WM8960 Audio HAT (built-in mics) | 1 | – | – |
| 21 | Waveshare 8 Ω 5 W speaker (100 × 45 × 21 mm) | 2 | – | – |
| 22 | M2.5 brass standoff, 11 mm | 1 | – | – |
| 23 | Zip tie, 4.8 mm wide, ≥ 150 mm long | 4 | – | – |
| 24 | 2×20 stacking header, if the HAT's pass-through pins stand less than 7.5 mm above its board | 1 | – | – |
| 25 | Raspberry Pi AI HAT+ 2 (Hailo-10H, 8 GB) | 1 | – | – |
| 26 | Raspberry Pi 5 Active Cooler | 1 | – | – |
| 27 | 2×20 stacking header | 1 | – | – |
27 of 27 parts have no price in the source, so there is no parts total. Read from docs/BOM.md at the pinned commit.
Build guide
The creator's steps, each with its instructions.
- 1Buy the parts from the Bill of Materials
- 2Print the parts
- 3Assemble the robot following the 13-step assembly guide
- 4Wire the electronics and run the pre-power checklist
The guide appears here as you scroll.
Guide by @patmakesapps (README.md), under CC-BY-SA-4.0.
More guides
Wiring and electronics
Notes written by Robotheca from the project's documents.
Main parts
- Raspberry Pi 5 (2 GB or larger) as the main computer
- Geekworm X1200 2-cell 18650 UPS HAT powering the Pi from two 18650 cells
- Adafruit 4280 DC and Stepper Motor Bonnet driving the motors, using a PCA9685 PWM chip
- Two N20 gear motors (plain or encoder) for drive
- CQRobot VL53L1X time-of-flight distance sensor
- 4 × AA battery pack powering the motors only
- Optional SLAMTEC RPLIDAR A1M8 with USB adapter board
- Optional Waveshare WM8960 Audio HAT with 8 Ω 5 W speakers
Connections
- X1200 connects to the Pi through pogo pins on the Pi's underside, with no wires
- Motor bonnet is pressed onto the Pi's 40-pin header
- Left motor connects to bonnet terminal M1 and right motor to M2; swap a motor's two wires if its wheel runs backward
- 4 × AA pack leads connect to the bonnet's motor power terminal, red to positive
- Arducam camera connects to any Pi USB port
- VL53L1X connects to Pi 3.3 V (pin 1), GND (pin 6), SDA GPIO2 (pin 3) and SCL GPIO3 (pin 5)
- I2C addresses on bus 1: 0x29 distance sensor, 0x60 motor bonnet, 0x70 bonnet all-call, 0x1a WM8960 audio codec when fitted
- Dome-to-base cables need at least 70 mm of slack so the dome can twist without pulling plugs
Cables and connectors
From the parts list.
- Jumper wires (female, 4 × for the VL53L1X to Pi I²C)