OpenRover
A 3D-printed Mars Perseverance-style rover replica with a 6-wheel drive, 4-axis robotic arm, and remote control with touchscreen and web dashboard.
- Wheeled
- Open source
- arduino
- 3D printable
Suggested by Robotheca, created by @pol-valero (opens in a new tab), from github.com/pol-valero/openrover-robotic-platform (opens in a new tab). Pinned to commit d06a0a3 (opens in a new tab).
- Hardware license
- MIT (opens in a new tab)
- Software license
- MIT (opens in a new tab)
- Commercial use
- Allowed
This repository contains executable files that Robotheca doesn't check. Only run them if you trust the creator.
Which files (3 files marked executable, 13 scripts, 3 firmware images)
- camera_and_webserver_module/raspberrypi_code/scripts/startupTasks.sh (opens in a new tab)
- central_rover_module/arduino_mega_code/lib/RF24/docs/sphinx/make.bat (opens in a new tab)
- remote_control_and_touchscreen_module/esp32s3_code/lib/lvgl/env_support/cmsis-pack/gen_pack.sh (opens in a new tab)
- remote_control_and_touchscreen_module/esp32s3_code/lib/lvgl/examples/test_ex.sh (opens in a new tab)
- remote_control_and_touchscreen_module/esp32s3_code/lib/lvgl/scripts/build_html_examples.sh (opens in a new tab)
- remote_control_and_touchscreen_module/esp32s3_code/lib/lvgl/scripts/changelog_gen.sh (opens in a new tab)
- remote_control_and_touchscreen_module/esp32s3_code/lib/lvgl/scripts/cppcheck_run.sh (opens in a new tab)
- remote_control_and_touchscreen_module/esp32s3_code/lib/lvgl/scripts/find_version.sh (opens in a new tab)
- remote_control_and_touchscreen_module/esp32s3_code/lib/lvgl/scripts/genexamplelist.sh (opens in a new tab)
- remote_control_and_touchscreen_module/esp32s3_code/lib/lvgl/scripts/infer_run.sh (opens in a new tab)
- remote_control_and_touchscreen_module/esp32s3_code/lib/lvgl/scripts/install-prerequisites.sh (opens in a new tab)
- remote_control_and_touchscreen_module/generic_remote_control_attachment/arduino_nano_code/lib/RF24-1.4.9/docs/sphinx/make.bat (opens in a new tab)
- remote_control_and_touchscreen_module/pcb_remote_control/arduino_nano_code/lib/RF24-1.4.9/docs/sphinx/make.bat (opens in a new tab)
- remote_control_and_touchscreen_module/touchscreen_ui_design_squareline/assets/ui_font_Montserrat_custom.bin (opens in a new tab)
- remote_control_and_touchscreen_module/touchscreen_ui_design_squareline/assets/ui_font_Montserrat_medium_custom_12.bin (opens in a new tab)
- remote_control_and_touchscreen_module/touchscreen_ui_design_squareline/assets/ui_font_Montserrat_medium_custom.bin (opens in a new tab)
- central_rover_module/arduino_mega_code/lib/RF24/configure (opens in a new tab)
- remote_control_and_touchscreen_module/generic_remote_control_attachment/arduino_nano_code/lib/RF24-1.4.9/configure (opens in a new tab)
- remote_control_and_touchscreen_module/pcb_remote_control/arduino_nano_code/lib/RF24-1.4.9/configure (opens in a new tab)
Photo
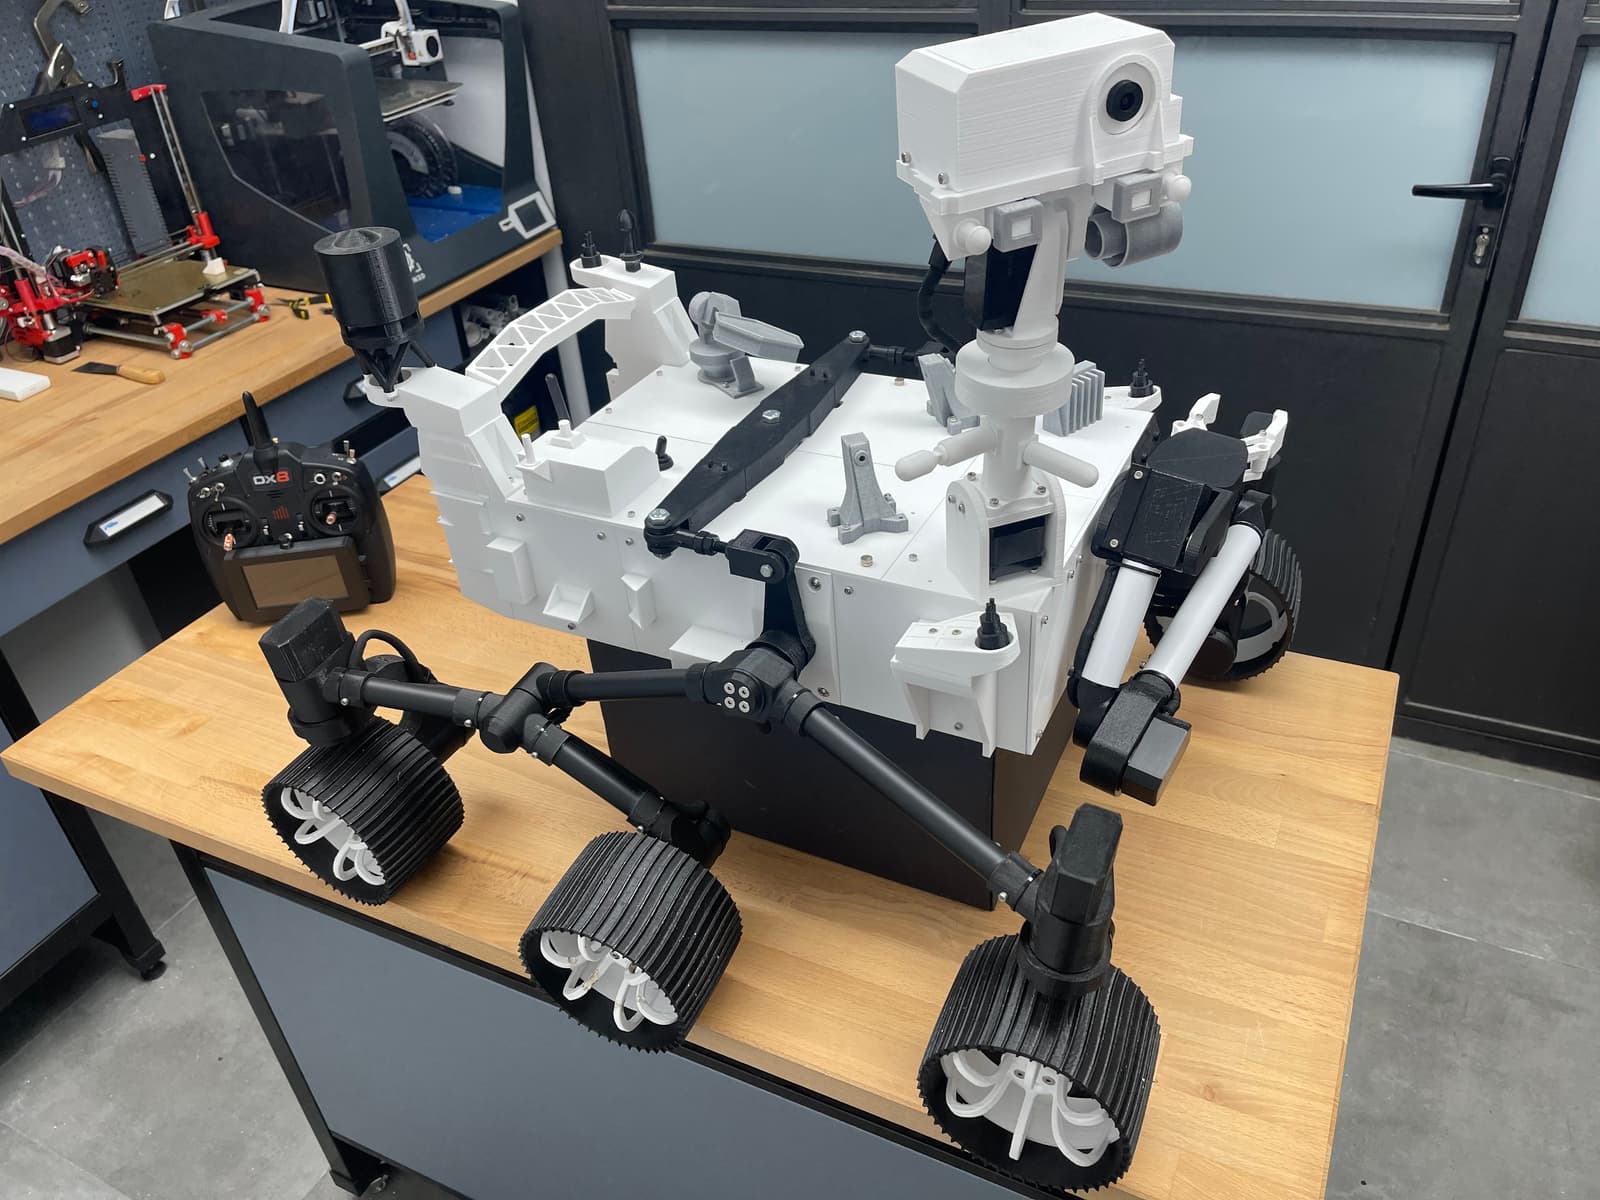
What it can do
Written by Robotheca from the project's documents.
- Six-wheel drive platform with four steerable wheels, a replica of the Mars Perseverance rover.
- Four-axis foldable robotic arm with a gripper.
- Tiltable and rotary head with space for a development board and a camera.
- Environmental sensing of temperature, humidity, pressure and altitude.
- Custom remote control with touchscreen showing status values and selectable operation modes.
- Battery monitoring for the rover and the remote control.
- Four operation modes: conventional driving, 360-degree turn, robotic arm control, head control.
- Web dashboard hosted on the rover showing status values and a video feed.
Bill of materials
This repository has no parts list Robotheca can read yet.
Build guide
The creator's steps, each with its instructions.
- 1Order all the mechanical and hardware parts
- 23D print the rover and remote controller parts
- 3Assemble the mechanical platform
- 4Create the wiring connections for the hardware components
- 5Set up and upload the code to the development boards
The guide appears here as you scroll.
Guide by @pol-valero (README.md), under MIT.
More guides
Wiring and electronics
Notes written by Robotheca from the project's documents.
Main parts
- Arduino Mega in the rover body managing motors, servos, stepper motor and sensors, with radio.
- RaspberryPi Zero 2W in the head connected to a RaspberryPi camera and generating a WiFi network.
- Arduino Nano in the remote control reading joystick channels, handling radio and measuring battery levels.
- ESP32-S3 touchscreen module in the remote control for the touchscreen UI.
- NRF24L01 radio transceiver modules on the rover and the remote control.
- DRV8871 motor drivers, A4988 stepper driver, MG996R/DS3225 servos, XD-37GB555 motors.
- BME280 environmental sensor and micro limit switch.
- LiPo battery with buck converters for power, and a CP2102 USB to TTL converter.
Connections
- Arduino Mega communicates with the RaspberryPi Zero over serial.
- Remote control and rover communicate by radio using NRF24L01 modules.
- Wiring for each module is given in its schematic PDF, which must be followed exactly.
- Remote control pieces are linked through JST-XH connectors and a logic level converter.
Schematics, boards and diagrams
- camera_and_webserver_module/camera_and_webserver_module_schematic.pdfDiagram
- central_rover_module/arduino_mega_code/lib/RF24/images/pinout.jpgDiagram
- central_rover_module/central_rover_module_schematic.pdfDiagram
- remote_control_and_touchscreen_module/generic_remote_control_attachment/arduino_nano_code/lib/RF24-1.4.9/images/pinout.jpgDiagram
- remote_control_and_touchscreen_module/generic_remote_control_attachment/rc_and_touchscreen_module_schematic-generic_remote.pdfDiagram
- remote_control_and_touchscreen_module/pcb_remote_control/arduino_nano_code/lib/RF24-1.4.9/images/pinout.jpgDiagram
- remote_control_and_touchscreen_module/pcb_remote_control/esp32s3_touchscreen_submodule_schematic-pcb_remote.pdfDiagram
- remote_control_and_touchscreen_module/pcb_remote_control/remote_control_pcb_design_easyeda.jsonEasyEDA
- remote_control_and_touchscreen_module/pcb_remote_control/remote_control_pcb_gerber.zipGerber (PCB manufacturing)


