ElectronBot
A robotic arm that can be controlled via Python, with servo control, image transmission, and integration with Unity for 3D visualization.
- Robot arm
- Open source
- 3D printable
Suggested by Robotheca, created by @gropery (opens in a new tab), from github.com/gropery/ElectronBot (opens in a new tab). Pinned to commit b434b81 (opens in a new tab).
- Hardware license
- GPL-3.0-only (opens in a new tab)
- Software license
- GPL-3.0-only (opens in a new tab)
- Commercial use
- Allowed
This repository contains executable files that Robotheca doesn't check. Only run them if you trust the creator.
Which files (179 programs or installers, 16 firmware images)
- 3.Software/_Tools/AHK-ExpansionPack/ElectronBotSDK/autoit_opencv_com455.dll (opens in a new tab)
- 3.Software/_Tools/AHK-ExpansionPack/ElectronBotSDK/concrt140d.dll (opens in a new tab)
- 3.Software/_Tools/AHK-ExpansionPack/ElectronBotSDK/ElectronBotSDK-LowLevel.dll (opens in a new tab)
- 3.Software/_Tools/AHK-ExpansionPack/ElectronBotSDK/ElectronBotSDK-Player.dll (opens in a new tab)
- 3.Software/_Tools/AHK-ExpansionPack/ElectronBotSDK/ElectronBotSDK源码/ElectronBotSDK-LowLevel/lib/USBInterface.dll (opens in a new tab)
- 3.Software/_Tools/AHK-ExpansionPack/ElectronBotSDK/ElectronBotSDK源码/ElectronBotSDK-LowLevel/src/lib/ElectronBotSDK-LowLevel.dll (opens in a new tab)
- 3.Software/_Tools/AHK-ExpansionPack/ElectronBotSDK/ElectronBotSDK源码/ElectronBotSDK-LowLevel/src/lib/USBInterface.dll (opens in a new tab)
- 3.Software/_Tools/AHK-ExpansionPack/ElectronBotSDK/ElectronBotSDK源码/ElectronBotSDK-Player/lib/ElectronBotSDK-LowLevel.dll (opens in a new tab)
- 3.Software/_Tools/AHK-ExpansionPack/ElectronBotSDK/ElectronBotSDK源码/ElectronBotSDK-Player/lib/USBInterface.dll (opens in a new tab)
- 3.Software/_Tools/AHK-ExpansionPack/ElectronBotSDK/ElectronBotSDK源码/ElectronBotSDK-Player/src/lib/ElectronBotSDK-Player.dll (opens in a new tab)
- 3.Software/_Tools/AHK-ExpansionPack/ElectronBotSDK/libusb0.dll (opens in a new tab)
- 3.Software/_Tools/AHK-ExpansionPack/ElectronBotSDK/msvcp140d.dll (opens in a new tab)
- 3.Software/_Tools/AHK-ExpansionPack/ElectronBotSDK/opencv_videoio_ffmpeg455_64.dll (opens in a new tab)
- 3.Software/_Tools/AHK-ExpansionPack/ElectronBotSDK/opencv_world455.dll (opens in a new tab)
- 3.Software/_Tools/AHK-ExpansionPack/ElectronBotSDK/ucrtbased.dll (opens in a new tab)
- 3.Software/_Tools/AHK-ExpansionPack/ElectronBotSDK/USBInterface.dll (opens in a new tab)
- 3.Software/_Tools/AHK-ExpansionPack/ElectronBotSDK/vcruntime140_1d.dll (opens in a new tab)
- 3.Software/_Tools/AHK-ExpansionPack/ElectronBotSDK/vcruntime140d.dll (opens in a new tab)
- 3.Software/_Tools/BotDriver/amd64/libusb0.dll (opens in a new tab)
- 3.Software/_Tools/BotDriver/ia64/libusb0.dll (opens in a new tab)
- and 175 more
Photo and 3D model
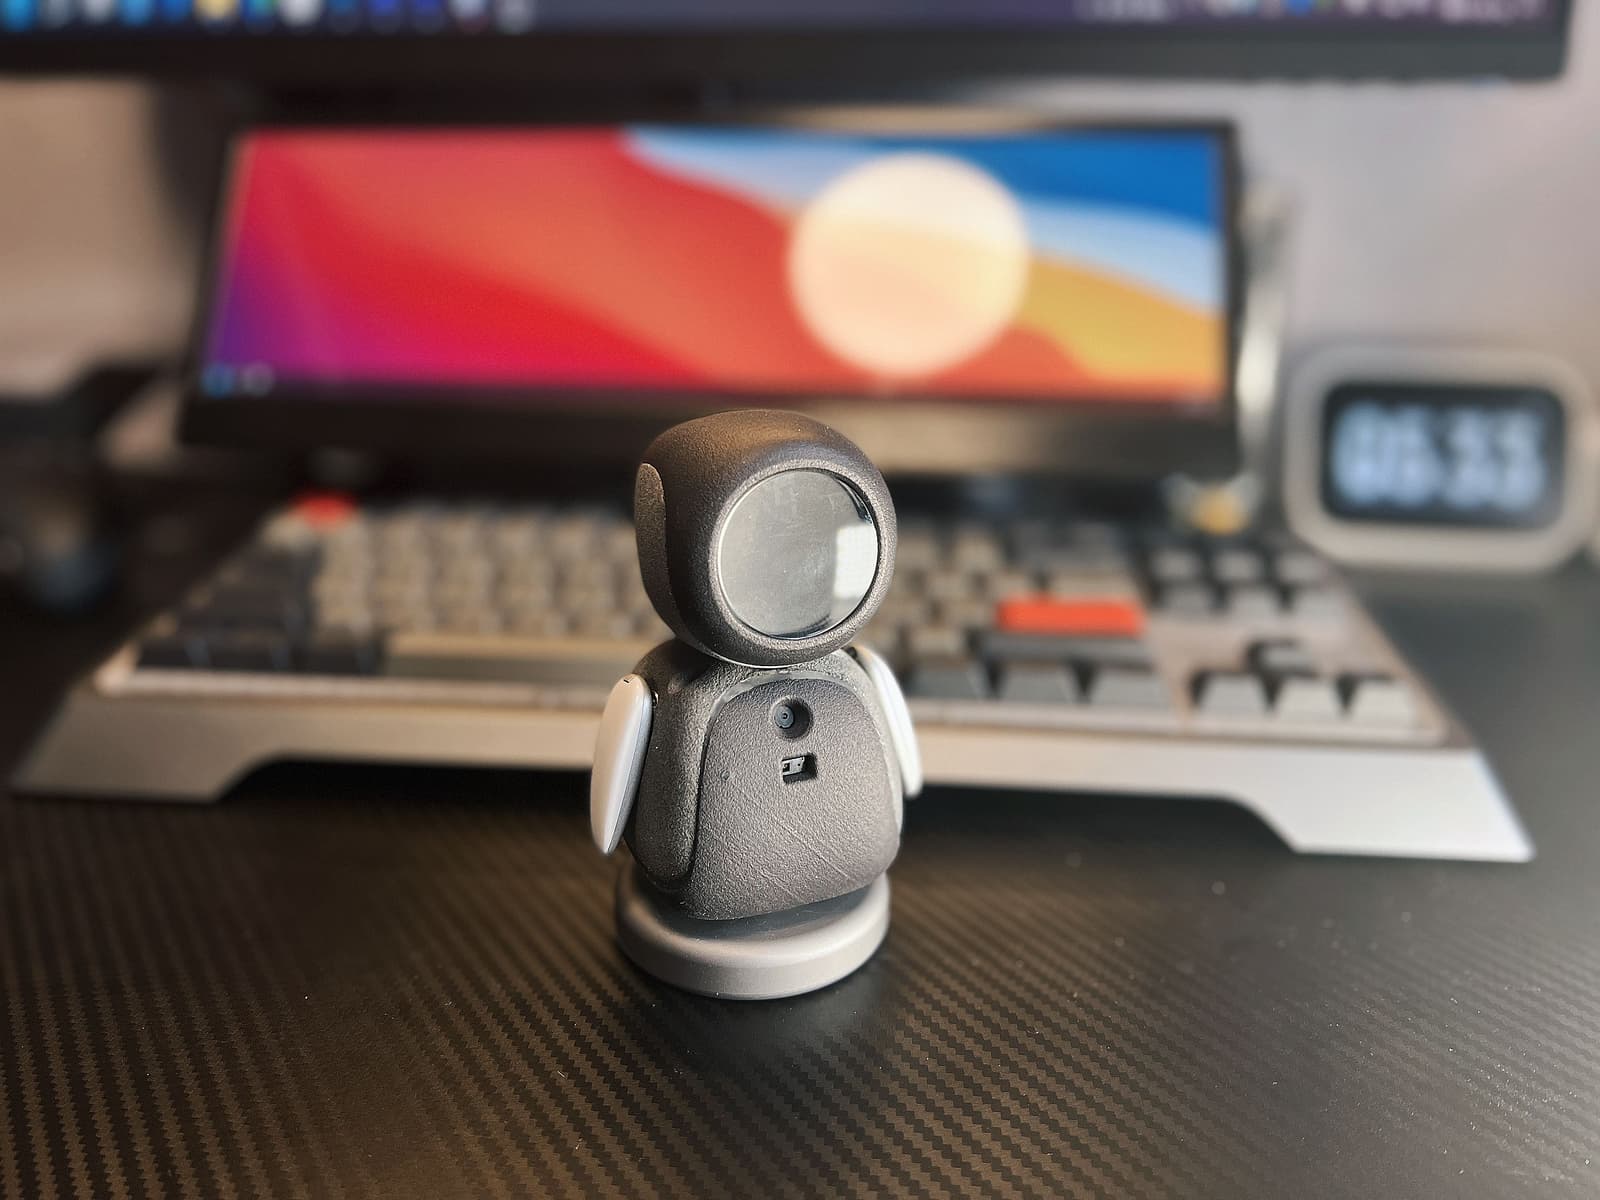
3D preview converted from github.com/gropery/ElectronBot at b434b81, under GPL-3.0-only. View the original files from GitHub (33.3 MB) (opens in a new tab)
What it can do
Written by Robotheca from the project's documents.
- Moves arms and head using six servos
- Streams video from a camera to a PC
- Displays time and weather on a Huawei smartwatch face
- Controlled via USB from a PC or Unity application
- Supports Python scripts for servo control and image capture
Bill of materials
This repository has no parts list Robotheca can read yet.
Build guide
The creator's steps, each with its instructions.
- 1Prepare hardware components and BOM
- 2Assemble PCB and electronics
- 33D print robot parts
- 4Install firmware using CLion
- 5Set up Python SDK and dependencies
- 6Test servo control and image transmission
- 7Integrate with Unity for 3D visualization
The guide appears here as you scroll.
Guide by @gropery (README.md), under GPL-3.0-only. The English translation is by Robotheca, shared under the same license.
More guides
Wiring and electronics
Notes written by Robotheca from the project's documents.
Main parts
- STM32 microcontroller on main PCB
- Six smart servos for arm and head joints
- Camera module for video streaming
- Huawei smartwatch display for time and weather
- USB interface for PC communication
- LCD screen for status display
- Sensor board with additional electronics
Connections
- Main PCB connects to six servos via servo connectors
- Main PCB connects to camera module via a dedicated camera port
- Main PCB connects to Huawei smartwatch display via a special connector
- Main PCB connects to LCD screen via a ribbon cable
- Main PCB connects to PC via USB cable for data and power
- Sensor board connects to main PCB via a multi-pin connector
Schematics, boards and diagrams
- 1.Hardware/BaseConnector/BaseConnector_ASCII.PcbDocAltium
- 1.Hardware/BaseConnector/BaseConnector.PcbDocAltium
- 1.Hardware/BaseConnector/GerberGerber (PCB manufacturing)
- 1.Hardware/BaseConnector/Main_ASCII.SchDocAltium
- 1.Hardware/BaseConnector/Main.SchDocAltium
- 1.Hardware/ElectronBot/ElectronBot_ASCII.PcbDocAltium
- 1.Hardware/ElectronBot/ElectronBot.PcbDocAltium
- 1.Hardware/ElectronBot/GerberGerber (PCB manufacturing)
- 1.Hardware/ElectronBot/Main_ASCII.SchDocAltium
- 1.Hardware/ElectronBot/Main.SchDocAltium
- 1.Hardware/SensorBoard/GerberGerber (PCB manufacturing)
- 1.Hardware/SensorBoard/Main_ASCII.SchDocAltium
- 1.Hardware/SensorBoard/Main.SchDocAltium
- 1.Hardware/SensorBoard/SensorBoard_ASCII.PcbDocAltium
- 1.Hardware/SensorBoard/SensorBoard.PcbDocAltium
- 1.Hardware/ServoDrive-DK/GerberGerber (PCB manufacturing)
- 1.Hardware/ServoDrive-DK/Main_ASCII.SchDocAltium
- 1.Hardware/ServoDrive-DK/Main.SchDocAltium
- 1.Hardware/ServoDrive-DK/ServoDrive-DK_ASCII.PcbDocAltium
- 1.Hardware/ServoDrive-DK/ServoDrive-DK.PcbDocAltium
- 1.Hardware/ServoDrive/GerberGerber (PCB manufacturing)
- 1.Hardware/ServoDrive/Main_ASCII.SchDocAltium
- 1.Hardware/ServoDrive/Main.SchDocAltium
- 1.Hardware/ServoDrive/ServoDrive_ASCII.PcbDocAltium
- 1.Hardware/ServoDrive/ServoDrive.PcbDocAltium
- 3.Software/_Tools/AHK-ExpansionPack/2.智能家居控制/2.小米无线开关接线示意图.jpgDiagram
