Tiny Engineer
A small desktop robot that moves, changes its face, and rings a bell as an AI coding assistant reads files, writes code, and finishes tasks.
- Home
- Open source
- arduino
- 3D printable
Suggested by Robotheca, created by @jamro (opens in a new tab), from github.com/jamro/tiny-engineer (opens in a new tab). Pinned to commit 8821a07 (opens in a new tab).
- Hardware license
- CERN-OHL-S-2.0 (opens in a new tab)
- Software license
- MIT (opens in a new tab)
- Commercial use
- Allowed
This repository contains executable files that Robotheca doesn't check. Only run them if you trust the creator.
Which files (1 file marked executable, 2 scripts)
Photo and 3D model
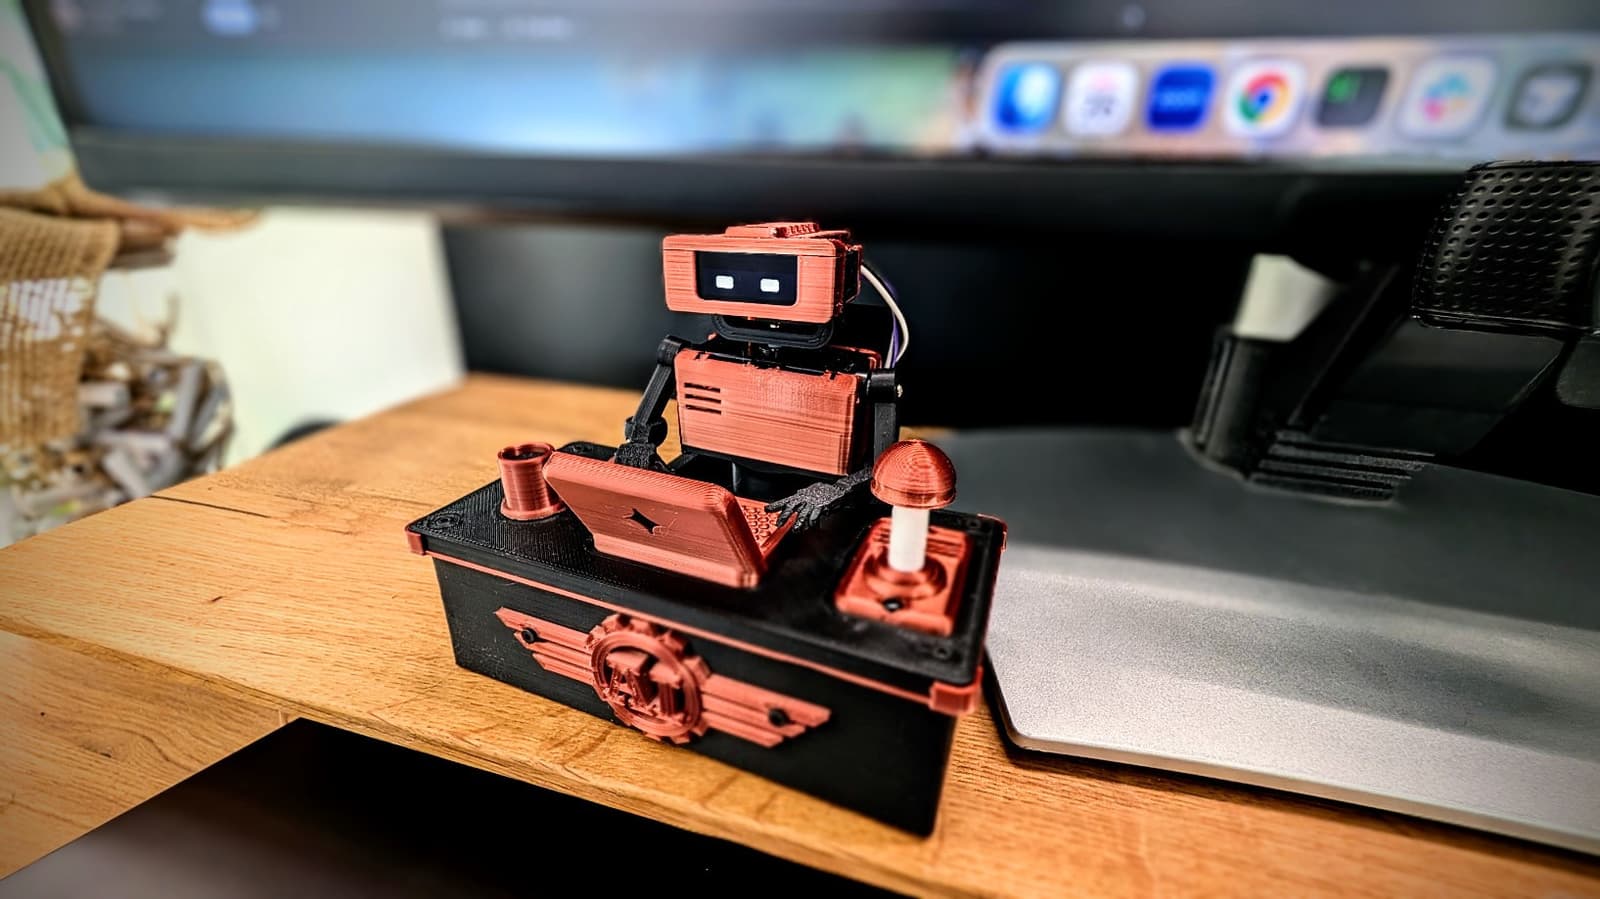
3D preview converted from github.com/jamro/tiny-engineer at 8821a07, under CERN-OHL-S-2.0. View the original files from GitHub (28.6 MB) (opens in a new tab)
- Power
- 5 V
What it can do
Written by Robotheca from the project's documents.
- Moves its head, neck, arms and body using five micro servos
- Changes its face shown on a small OLED display
- Plays sounds such as a bell ring through a speaker
- Runs animations triggered by HTTP POST requests from a coding agent or script
- Joins home Wi-Fi and exposes a REST API and web UI
- Integrates with coding agents such as Claude Code, Cursor and Antigravity via a command-line setup
Bill of materials
This repository has no parts list Robotheca can read yet.
Build guide
The creator's steps, each with its instructions.
- 1Print the 3D parts
- 2Order or build the main control board
- 3Connect the ESP32, servos, OLED, and speaker to the main control board
- 4Flash the firmware
- 5Assemble the printed parts
- 6Connect to Wi-Fi and hook up your coding agent
The guide appears here as you scroll.
Guide by @jamro (README.md), under CERN-OHL-S-2.0 (hardware) and MIT (software).
More guides
Wiring and electronics
Notes written by Robotheca from the project's documents.
Main parts
- ESP32-C3-Zero microcontroller board with Wi-Fi
- Main control board (open-source KiCad design) carrying the ESP32, servo headers and OLED header
- Five SG90-type micro servos for head, neck, arms and body
- Waveshare OLED display
- Speaker driven by a MAX98357A amplifier
- PCA9685 servo driver as an optional modular alternative
- USB-C breakout as an optional modular alternative
- Onboard LED on the ESP32 used as a status indicator
- 5 V power supply rated at least 2 A via USB-C
Connections
- Servos plug into labeled headers on the main control board, or into a PCA9685 in the modular build
- PCA9685 channels: 0 head pitch, 1 neck yaw, 2 left hand, 3 right hand, 4 body
- OLED cable plugs into its header on the board or the harness
- Speaker connects to SPK+ and SPK- on the board, using either a connector or solder pads, never both
- ESP32 seats into board headers from above, oriented by the USB marking on the PCB
- Power enters through the board USB-C port at 5 V and at least 2 A
Schematics, boards and diagrams
- .cursor/skills/easyeda-to-kicad/scripts/import_lcsc.pyEasyEDA
- .cursor/skills/easyeda-to-kicad/SKILL.mdEasyEDA
- hardware/boards/compact-carrier-board/compact-carrier-board.kicad_pcbKiCad
- hardware/boards/main-control-board/libraries/3d/easyeda.3dshapes/HDR-TH_15P-P2.54-V-M-R3-C5-S7.5.stepEasyEDA
- hardware/boards/main-control-board/libraries/3d/easyeda.3dshapes/HDR-TH_15P-P2.54-V-M-R3-C5-S7.5.wrlEasyEDA
- hardware/boards/main-control-board/libraries/3d/easyeda.3dshapes/TQFN-16_L3.0-W3.0-P0.50-BL-EP1.5.stepEasyEDA
- hardware/boards/main-control-board/libraries/3d/easyeda.3dshapes/TQFN-16_L3.0-W3.0-P0.50-BL-EP1.5.wrlEasyEDA
- hardware/boards/main-control-board/libraries/3d/easyeda.3dshapes/TSSOP-28_L9.7-W4.4-H1.0-LS6.4-P0.65.stepEasyEDA
- hardware/boards/main-control-board/libraries/3d/easyeda.3dshapes/TSSOP-28_L9.7-W4.4-H1.0-LS6.4-P0.65.wrlEasyEDA
- hardware/boards/main-control-board/libraries/3d/easyeda.3dshapes/USB-C-SMD_TYPE-C-6PIN-2MD-073.stepEasyEDA
- hardware/boards/main-control-board/libraries/3d/easyeda.3dshapes/USB-C-SMD_TYPE-C-6PIN-2MD-073.wrlEasyEDA
- hardware/boards/main-control-board/libraries/3d/easyeda.3dshapes/WSON-8_L2.0-W2.0-H0.8-P0.50.stepEasyEDA
- hardware/boards/main-control-board/libraries/3d/easyeda.3dshapes/WSON-8_L2.0-W2.0-H0.8-P0.50.wrlEasyEDA
- hardware/boards/main-control-board/libraries/footprints/easyeda.pretty/HDR-TH_15P-P2.54-V-M-R3-C5-S7.5.kicad_modEasyEDA
- hardware/boards/main-control-board/libraries/footprints/easyeda.pretty/TQFN-16_L3.0-W3.0-P0.50-BL-EP1.5.kicad_modEasyEDA
- hardware/boards/main-control-board/libraries/footprints/easyeda.pretty/TSSOP-28_L9.7-W4.4-P0.65-LS6.4-TL.kicad_modEasyEDA
- hardware/boards/main-control-board/libraries/footprints/easyeda.pretty/USB-C-SMD_TYPE-C-16PIN-2MD-073.kicad_modEasyEDA
- hardware/boards/main-control-board/libraries/footprints/easyeda.pretty/WSON-8_L2.0-W2.0-P0.50-TL-EP.kicad_modEasyEDA
- hardware/boards/main-control-board/libraries/symbols/easyeda.kicad_symEasyEDA
- hardware/boards/main-control-board/main-control-board-esp32.kicad_schKiCad
- hardware/boards/main-control-board/main-control-board-pca.kicad_schKiCad
- hardware/boards/main-control-board/main-control-board-usb-audio.kicad_schKiCad
- hardware/boards/main-control-board/main-control-board-usb.kicad_schKiCad
- hardware/boards/main-control-board/main-control-board.kicad_pcbKiCad
- hardware/boards/main-control-board/main-control-board.kicad_schKiCad