Project files
6 KB
Machine-translated by Robotheca from the original in Chinese (opens in a new tab). License: GPL-3.0-only (opens in a new tab).
MCar-Arudino-ESP01S
A Mecanum-wheel car based on ESP01S.
Bilibili demo video: https://www.bilibili.com/video/BV1oL4y1i7sb (opens in a new tab)
Tutorial video: https://www.bilibili.com/video/BV1KR4y1b7LR (opens in a new tab)
0. About This Project
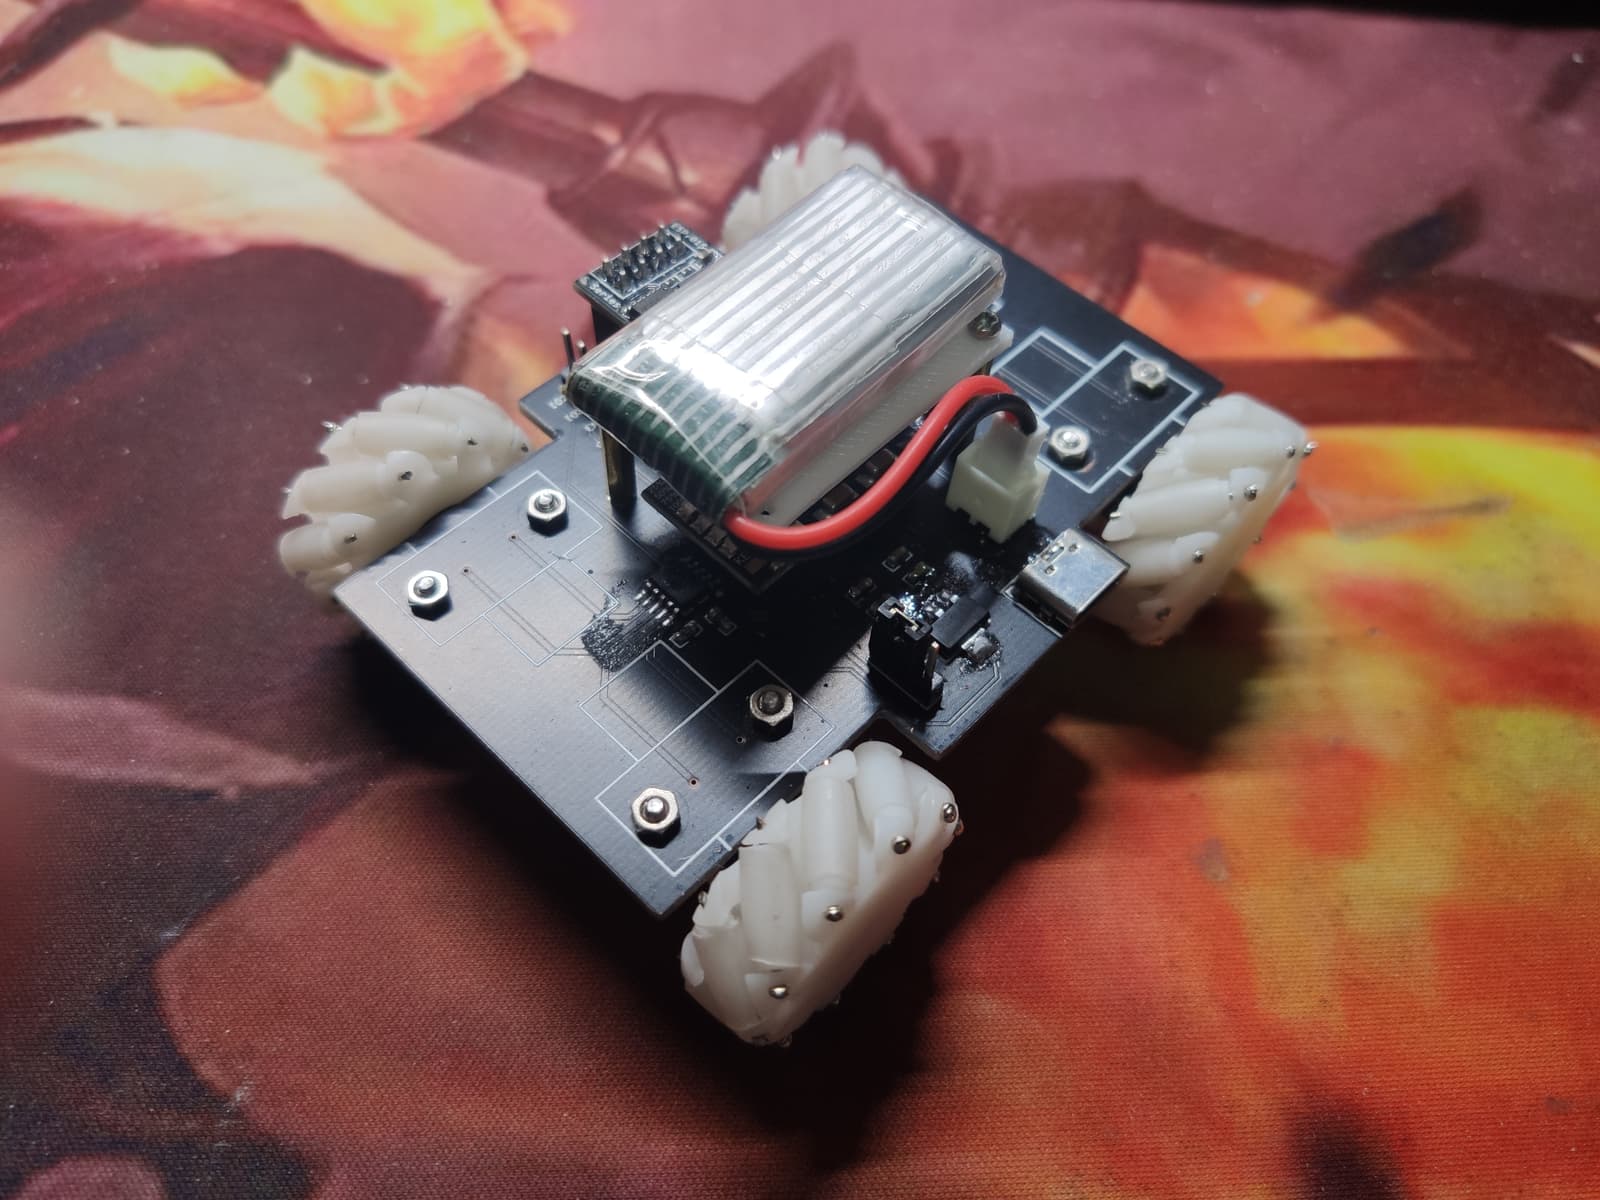
After seeing the schematic for the TMI8549 chip in a video by @孟德尔の公主切, which uses a single pin to control a wheel, I got the idea to build a mecanum-wheel car using an ESP01S, which conveniently has only four GPIOs. The result was this project, which costs less than 40 yuan.
1. Hardware Prototyping Instructions
The Hardware folder contains the AD source files for the PCB, which can be sent directly for prototyping. The component BOM is listed in the material list on the surface.
Since the ESP01S has only four pins, I directly connected the enable pin of the 8549 chip to 3.3V and control forward, reverse, and stop via PWM. So far, apart from being quite noisy, no issues have been found.
During soldering, you can refer to the ESP01S麦轮.html file to view the corresponding BOM table.
2. Firmware Compilation Instructions
Mainly developed based on Arduino, controlled according to the Mecanum wheel formula shown in the diagram below
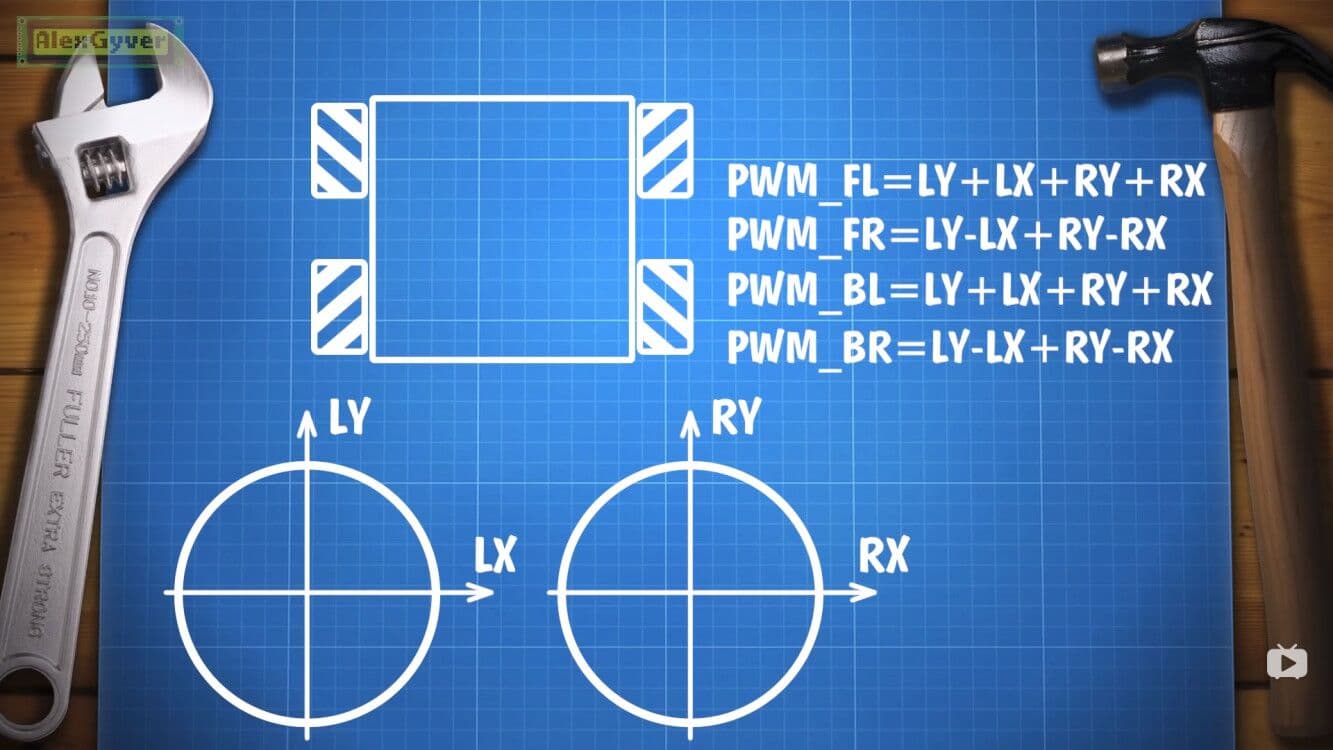
Mecanum wheels, also known as omnidirectional wheels, are omnidirectional wheels because the rim is equipped with many small rollers arranged diagonally, allowing lateral movement. By coordinating the control of four wheels, many actions can be accomplished. The image below shows the roller direction when viewed from the top, so the resultant force direction can be imagined as the direction of the rollers at the bottom, which looks like “<>”

3. Android App Instructions
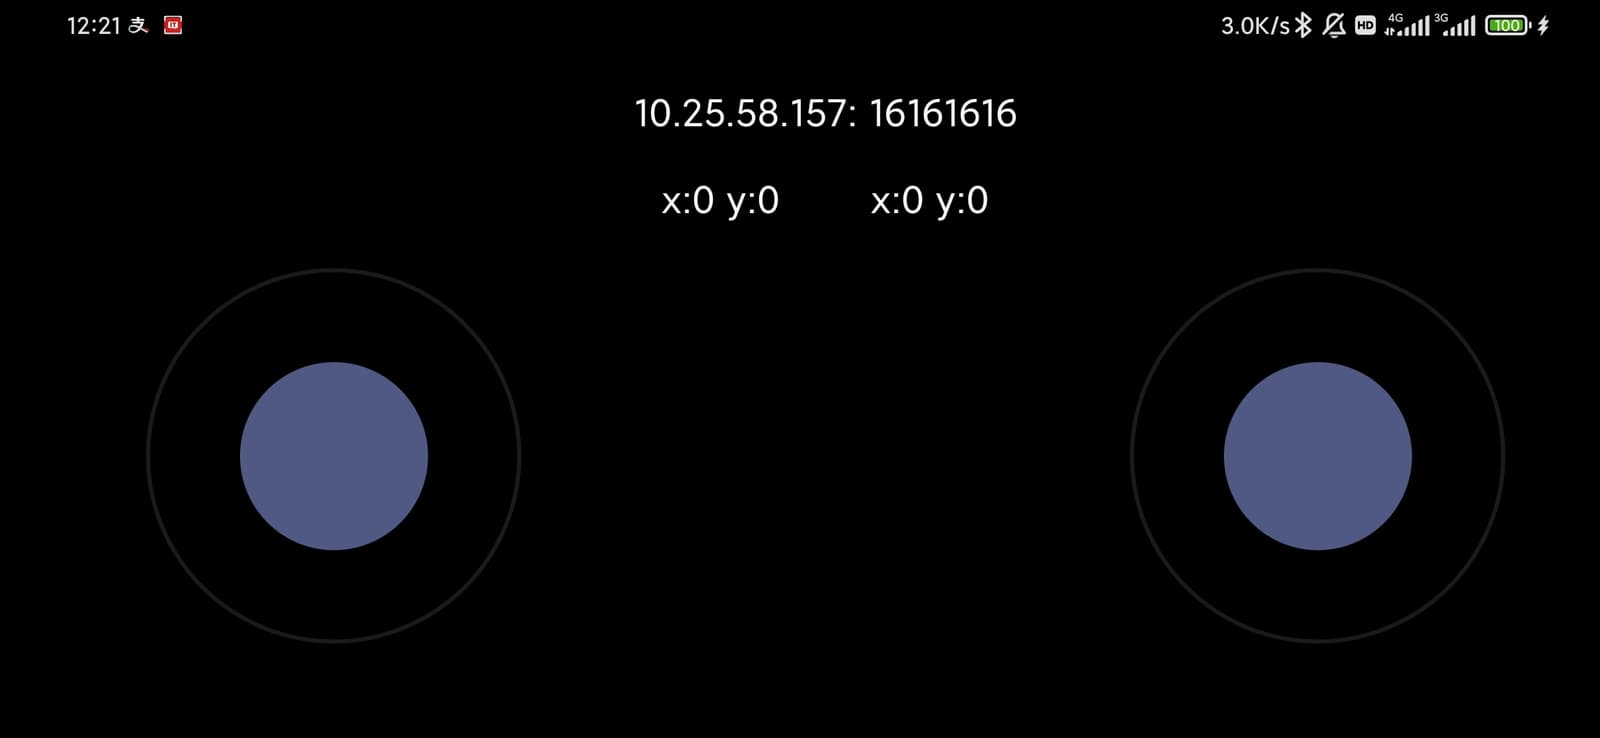
The app is located in the Software folder and is currently in a functional but basic state.
The app essentially consists of two joysticks and a UDP broadcast to port 9999. The data packet contains four numbers ranging from 0 to 32. For example, 16161616 represents both joysticks returning to their original positions. Once the joysticks return to the center, the app sends 16161616 once and stops broadcasting until the next joystick movement.
Simply connect your phone and the module to the same Wi-Fi network, and have the module listen on port 9999.
4. Mecanum Wheel Assembly Instructions
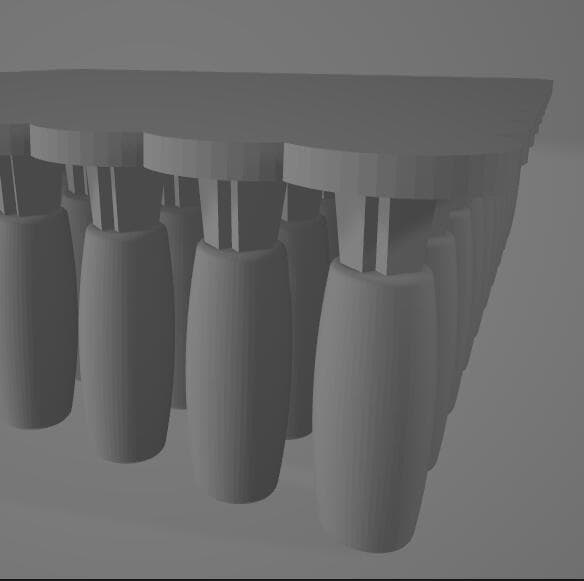
The compressed package in the Docs folder contains the 3D printing files and assembly instructions for the mecanum wheels shared by Bilibili creator @孟德尔の公主切开源. Feel free to support their video with a triple like!
https://www.bilibili.com/video/BV1wq4y1774g (opens in a new tab)
The
辊子100个.STLfile in theDocsfolder was designed in Solidworks to meet the wall thickness requirements of the 3D Monkey. It was a painstaking process, so use it with caution. The other end is blocked, requiring not only hole expansion but also drilling (tearful). It took me an entire night to complete four wheels. If more people need it, I’ll redraw and release a new version.
5. Questions about this project
First is the delay in remote control (already fixed)
Thanks to @27岁的188 on Bilibili for pointing this out. The cause was that when running to the
map()function, the parameters were not set correctly, causing the chip to restart—yes, it restarted. Filtering out erroneous values can solve this issue, and the open-source code has been corrected.
Next is the drift when the mecanum wheels move laterally. Initially, the robot couldn't move sideways at all, but after implementing two measures, it now performs as shown in the video:
- I used electrical tape to insulate between the motor housing and the contacts to prevent short circuits. This allowed me to tighten the screws on the motor mount, securing the motor more firmly.
- I removed the rollers, sanded both ends with sandpaper, and reamed the holes with a drill bit to make the rollers rotate more smoothly.
Overall, these are inherent drawbacks of homemade mecanum wheels. The only solutions are to increase friction, either by adding weight to the entire vehicle (increasing pressure) or by increasing the friction coefficient of the wheel surfaces.
There are still some issues with this project that I haven't been able to solve personally or haven't had time to address. I’ve listed them here in the hope that experts in the relevant fields can provide insights:
-
High motor noise when stopped
This is because the ESP01S doesn’t have extra pins to control the TB6612FNG’s EN pin, so I had to pull it high, which also seems to increase current draw and drain the battery quickly.
Normally, the EN pin should be pulled low when stopped. Without changing the main controller, my attempts to solve this have included:
- Hardware: Since I haven’t studied digital or analog electronics, the only idea I had was to use a transistor circuit to achieve pin reuse. However, since there are no extra pins to control the transistor, I haven’t come up with a hardware solution yet.
- MCU: The difference between ESP01S and ESP01 is that the S version doesn’t require pulling the EN pin high during startup. I wondered if the EN pin could be utilized in certain scenarios, such as sleep mode, which would directly solve the pin shortage issue.
In short, I’m overcomplicating things, and I’d also like to learn about solutions for situations with limited pins.
-
Motor speed cannot be adjusted based on joystick movement distance
Due to the nature of mecanum wheels, each wheel must rotate at different speeds. The code includes a
localMaxvalue to amplify the speed.Since a certain amount of torque is required to start the motor, without amplification, a slight joystick movement might not make the robot move. The original author likely added amplification to proportionally increase the speed, ensuring that at least one wheel reaches maximum speed.
There are two issues here:
- The joystick doesn’t adjust speed proportionally to the movement distance.
- Wheels with a low speed ratio might not have enough torque to move, causing the robot’s direction to deviate from the intended path.
The solution is to set a minimum torque threshold and map the speed between this minimum and the maximum value. However, since I don’t currently have these two requirements, I’m leaving the solution idea here.
-
Insufficient friction of mecanum wheels
Buying four mecanum wheels for ¥8.5 each on Taobao can solve this, but the couplers I designed based on the mecanum wheel manual and 3D-printed for this motor tend to break—not the printed parts, but the motor itself. So, if using off-the-shelf mecanum wheels, the motor may need to be replaced.
Here’s a link to the motor for off-the-shelf mecanum wheels (I bought the 48mm version without interfaces). The coupler I designed is in the
Docsfolder:
More updates to follow, please give the video a thumbs-up~
Files by @AndyXFuture, at commit 1c18bd9, read from GitHub in your browser. Hardware license: GPL-3.0-only; software license: GPL-3.0-only. Robotheca doesn't review code: read it before running it.